How To: Cut a texture using the 1v1 board
- tr3lon1st
- 11. Sept. 2016
- 3 Min. Lesezeit
This tutorial will explain how to cut textures according to their visual appearance. This can be applied to all kinds of textures. However, I will demonstrate it using the Stone Pavers texture. This, of course, requires everyones' favorite board: the 1v1 board. If you don't know how that works, take a look at the 1v1 board tutorial (Part 1 & Part 2) I did before.

First, we have to decide what shape we want the texture to have when we're done. Since the texture itself offers a variety of different options, we can simply pick the border we want. I have painted a texture and marked the line I want to cut with a yellow line. I have then removed the texture from the space we do not want to keep in order to make it more obvious:
The way we advance through this process is by making a call for every block along this line. Simply put a 1x1 size Selection Tool above a spot along the line you chose and determine where the line runs through that Selection Tool box. You then have to find the corresponding piece on the 1v1 board. Below you can see an example of what that can look like:

The pictures above shows a spot on the line that runs exactly through the center of a block. We can find a corresponding block on the 1v1 board whose center block also runs through that exact spot.
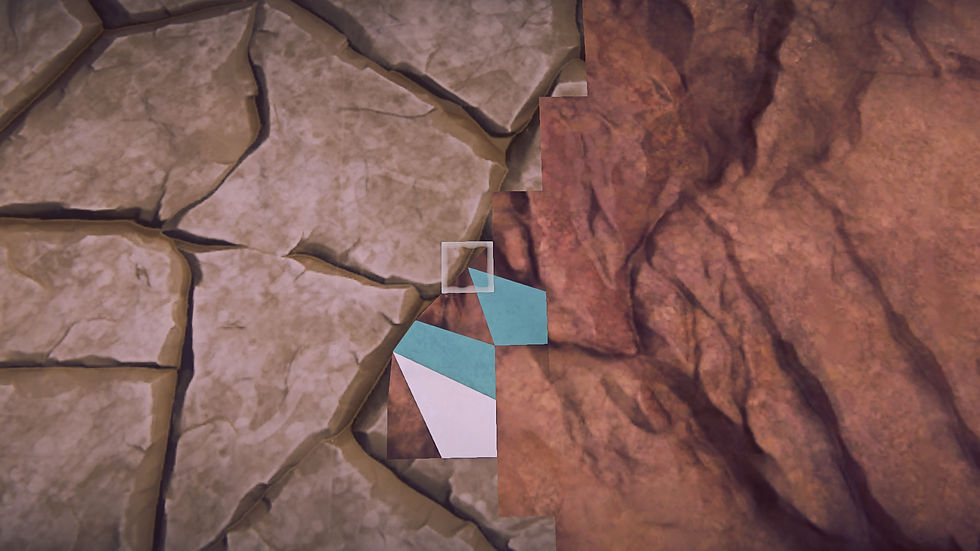
In order to affect the area, we need a block that will do the job. The choice is yours, simply pick one of the blocks from this part of the board that will push the block without affecting the line itself. I chose the teal block in the bottom right of the 3x3 part of the 1v1 board. Placing it on the correct spot will push the blocks in place:

We basically repeat this process for every block along our line. I will demonstrate examples of what different spots require from the board:

The point where the line croses the block is close to one of its corners. Since we can mirror and turn blocks any way we like, we can find its counterpart on the board facing the other direction. By copying the white block on the bottom left of the 3x3 piece of the 1v1 board and mirroring it, we can meet the exact point we were looking for.

Further up the line, we can find another spot that also runs right across the center of the block. We can therefore use the first block we used before. We can either pick it up from the 1v1 board, or we can go backwards enough steps (CTRL + Z) to retrieve the shape below. Once we've copied that, we can reproduce the steps again (CTRL + Y) to return to the current state. There we can place it down to affect the blocks as depicted above. We can now paint the blocks with the dirt texture to get a better idea of how we're progressing:

It becomes inevitable to get comfortable switching between stages of building by using the keyboard commands for taking a step back (CTRL + Z) and taking a step forward (CTRL + Y). Because of the dependencies between blocks, it will eventually become impossible to push all blocks along the line without affecting already altered blocks. The following example illustrates that problem:

Having placed a block that fits the texture line, we pulled out a block further to the top that we have already fit before. We can solve this by jumping back and forth in the building process. We have to copy out a block that we will later add to the current result again.
The block we want to preserve in the end is the one fitting the line. Select and copy (CTRL + C) it. Use CTRL + Z to move back a step to undo the last pasting of the block. Now add the block you copied before into the world (CTRL + V), enter Fine Tune Mode (T) and move it into the ground. Place it by confirming your changes - done!

The challenge here is to find the correct piece on the 1v1 board. Prepare yourself for a lot of trial and error. But be aware that once you're done, you will have had a prime training lesson in using the 1v1 board!


Kommentare